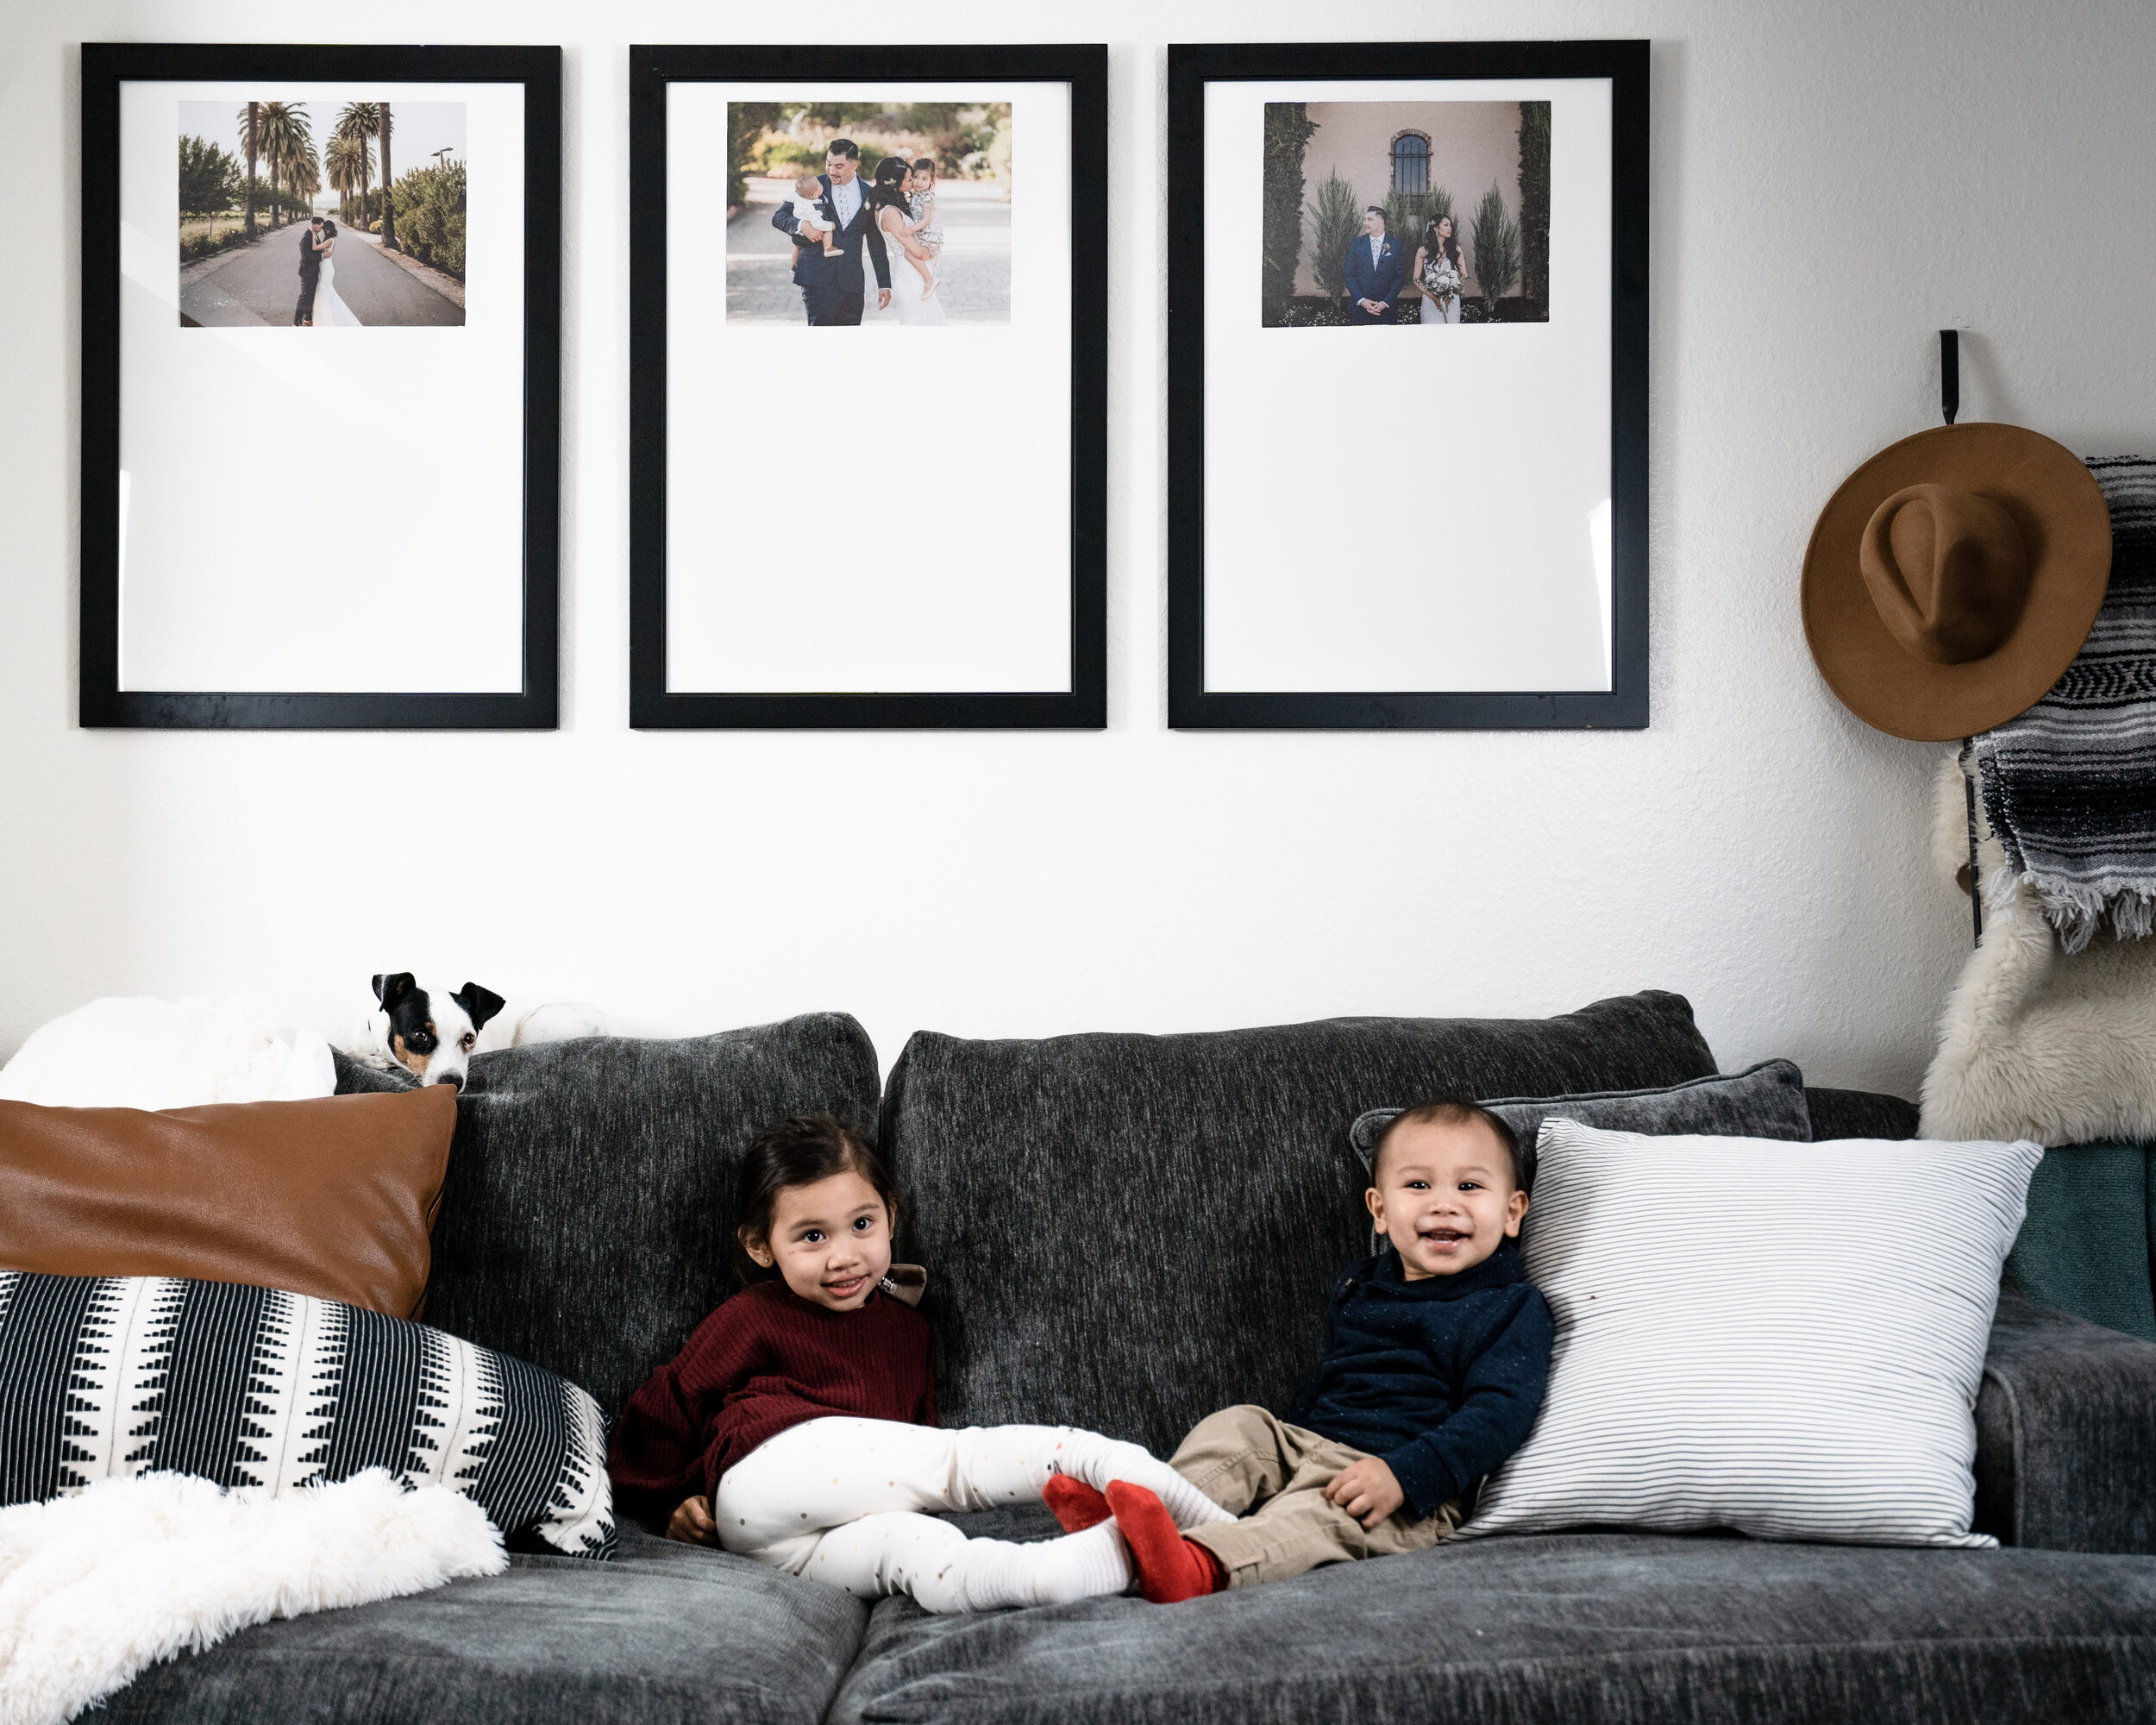
I have been obsessed with Framebridge’s “Triptych” gallery wall. So as soon as I got our wedding photos I knew that’s how I wanted to showcase them. However after spending so much on the wedding, I was hesitant to pay so much for photo frames. So I challenged myself to try and recreate the same look and for even cheaper.

The Triptych | $450 | Framebridge
Materials
(3) 11” x 14" Photos - I used MPIX to print my photos
(3) 20” x 30" Black Frames
Ruler
X-Acto Knife
Instructions
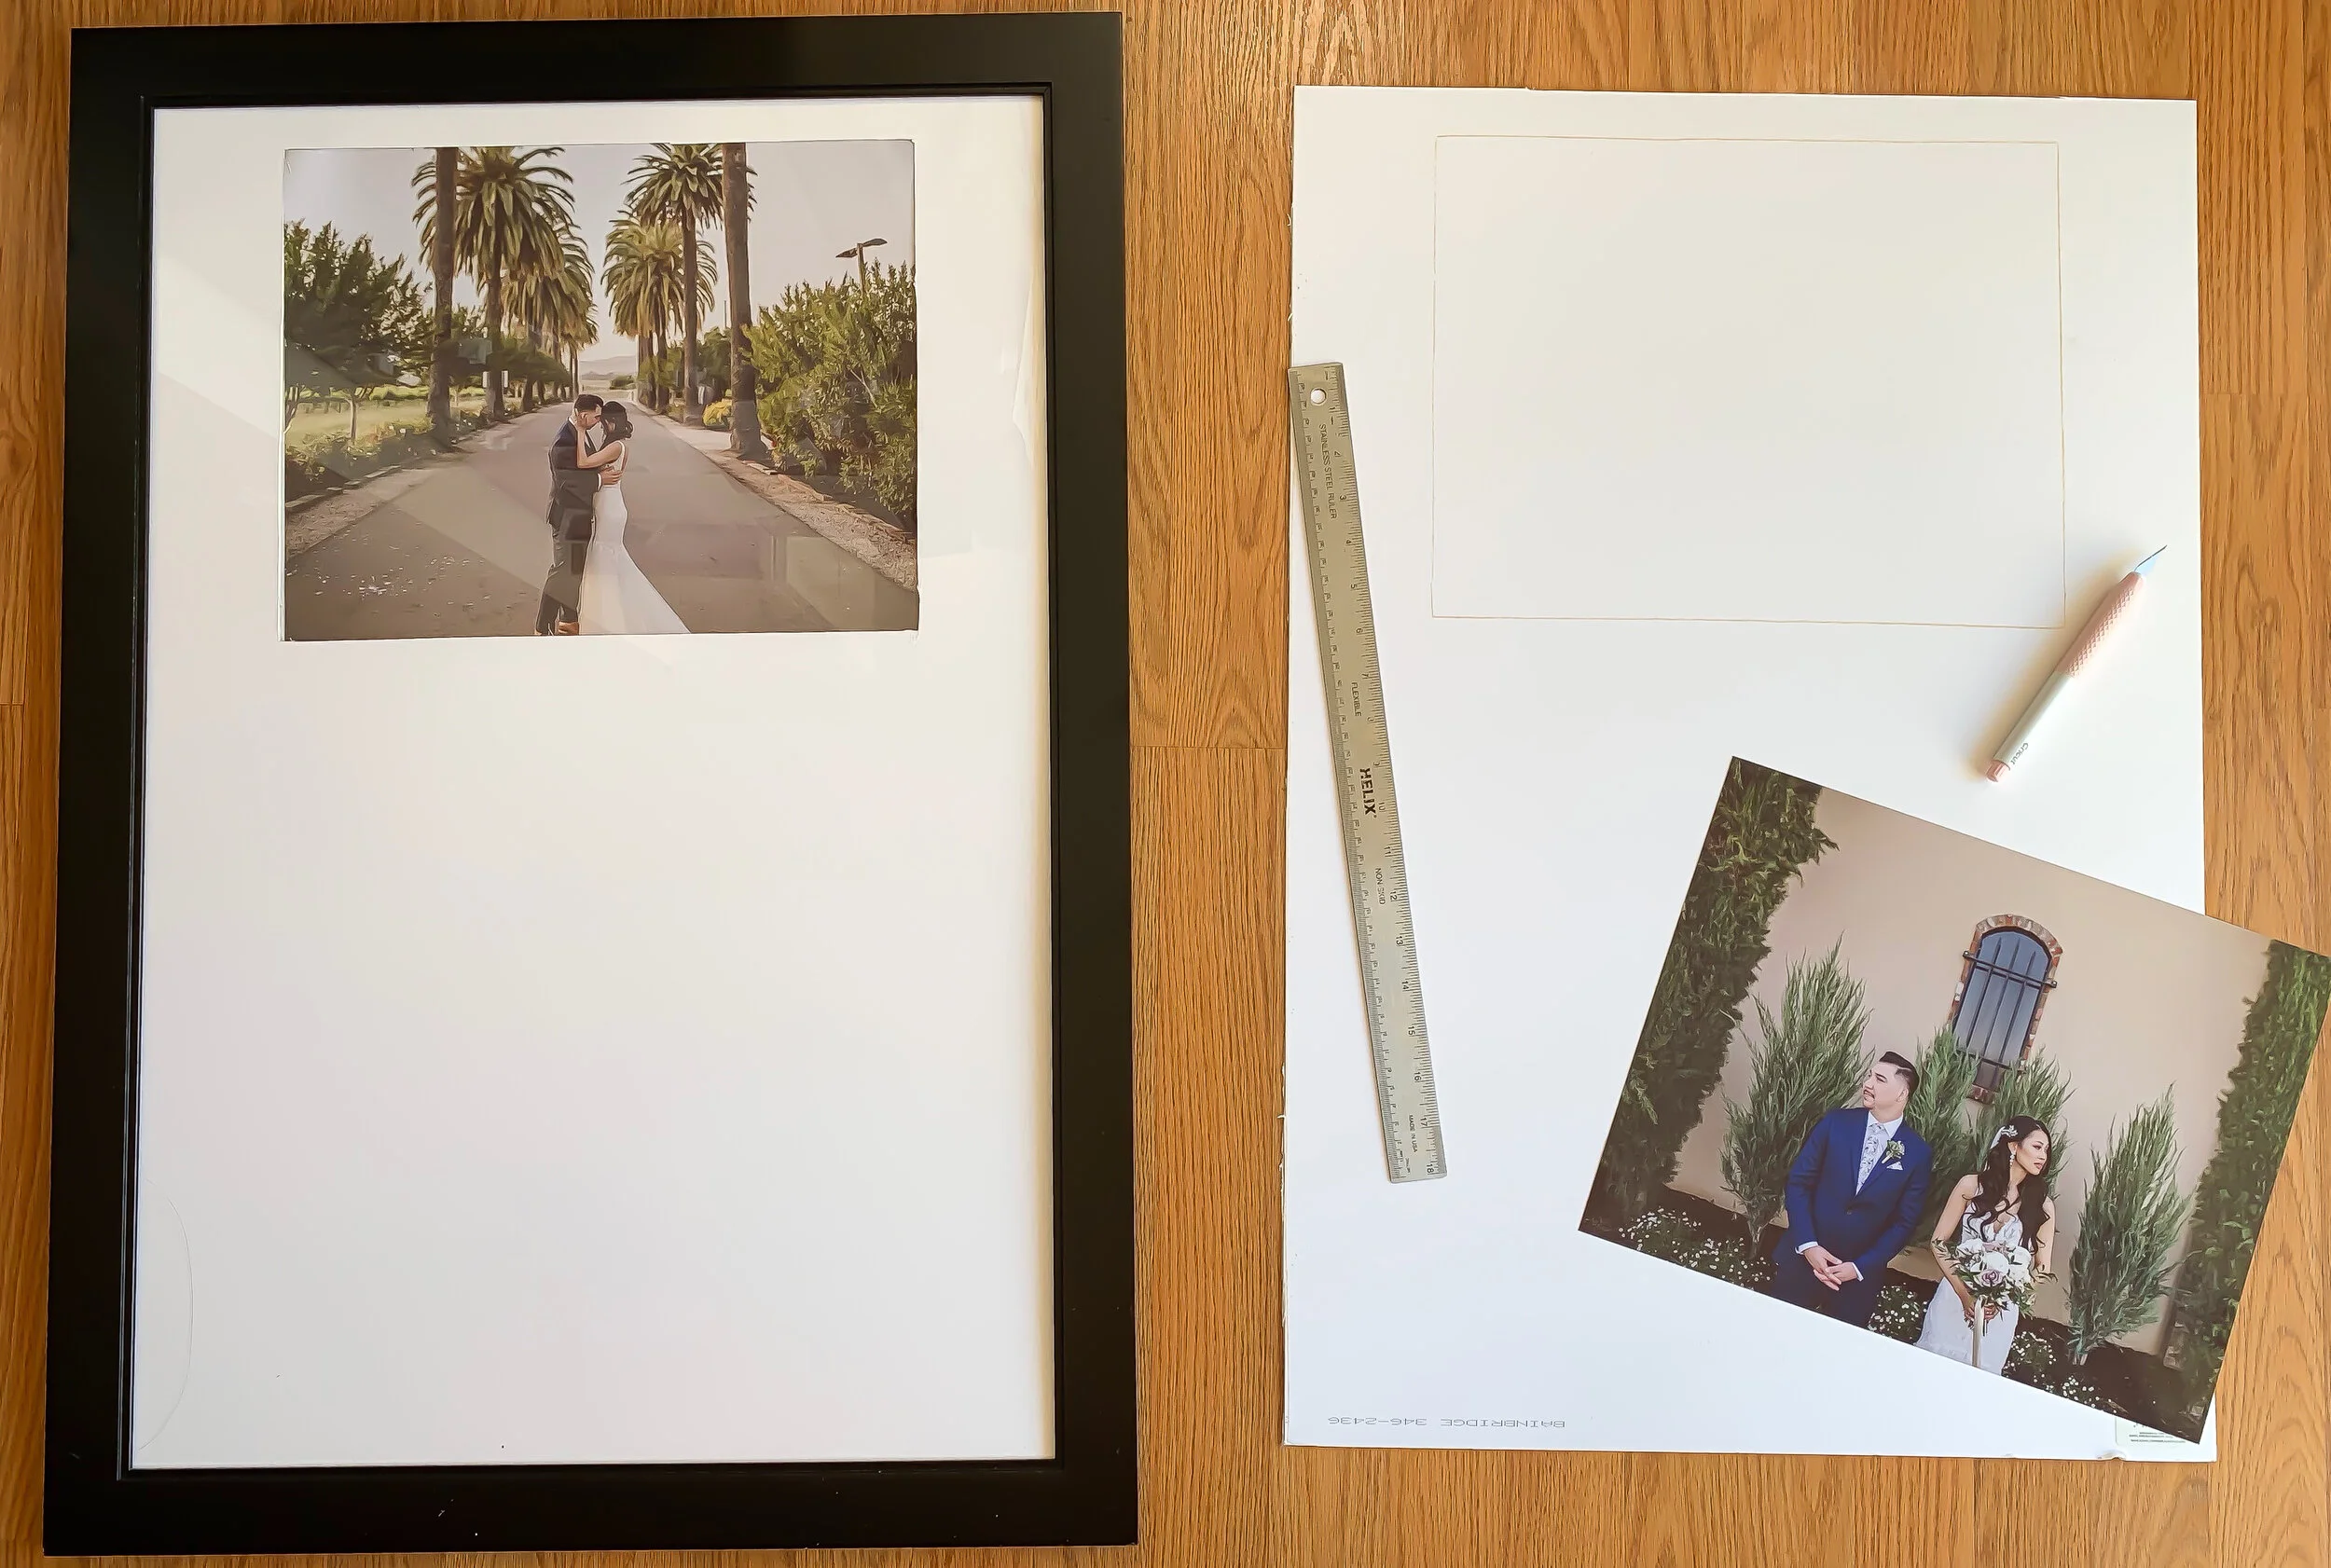
Measure and mark the photo mats to fit the size of your frames. The mats were 24” x 36” and needed to be cut down to 20” x 30".
Next measure the area that will be cut out for your photo. Use your photo as a guide to mark the area. Place your 11” x 14” photo 1” from the top. When it is centered, there should be 3” of space on each side of the photo. That will leave 12” of space below the photo.
Here’s the tricky party, cutting off the excess area of the photo mat and the box area of where the photo will be. I suggest using a metal ruler with a cork backing, this will help keep the ruler in place as you cut.
If you’ve never used an exacto knife, here are some tips on how to properly use one.
Once everything is cut, start to assemble photo mats & photos in frames. I taped photos to the mats to make sure they stayed in place once they were put up. I noticed the photo would slide and be off by a little if I didn’t tape them down.
Once all your frames are set, they’re ready to be hung! My last tip is to use the middle photo frame as your guide to hanging all the frames. Once you hang your middle photo, hang the other two frames 3-5 inches apart.

the finished product!